
Follow the below steps to customise the business details that are printed on your receipts.
1. Navigate to the Settings Tab on your humble webTill.

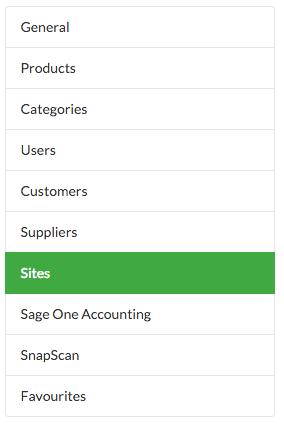
2. From within Settings navigate to and click on Sites located on the left hand side of your screen.
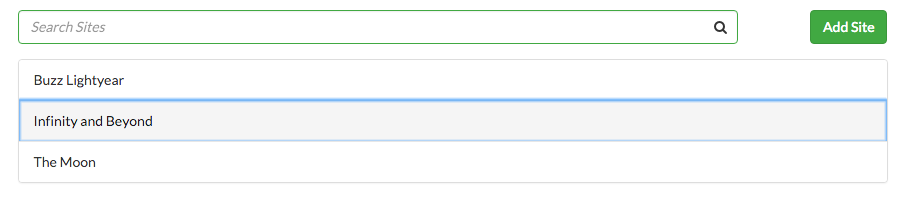
3. If you have more than one Site saved, choose the one that you are currently logged in to.
4. Edit or Update the Sites details, such as the Address and contact details.
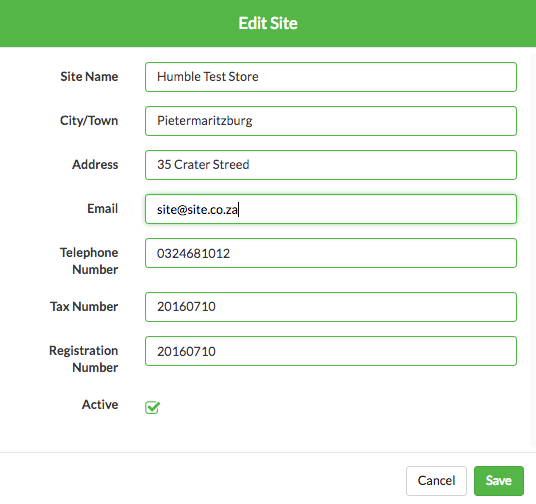
5. Once you are finished simply click on Save, in the bottom right hand corner.
Your company details will now be printed when you print your next receipt.
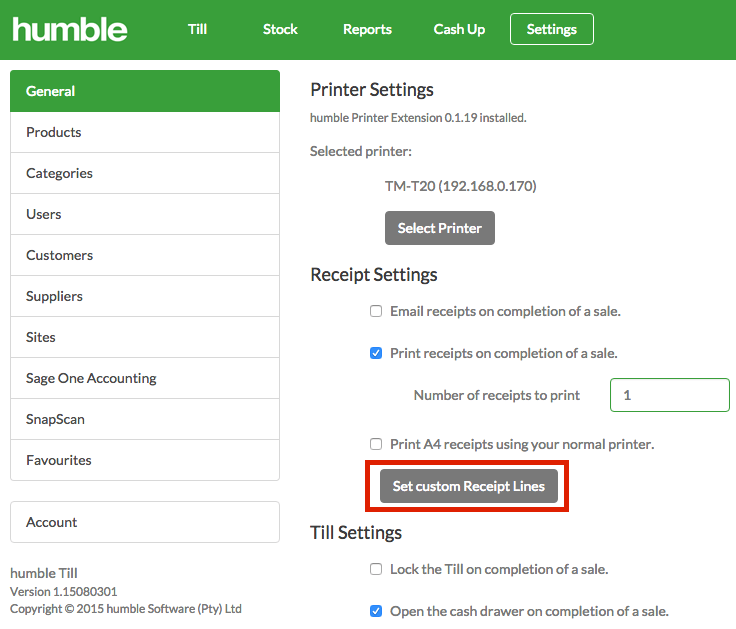
6. If you would like to add additional information on your receipts, such as a message for your customers or your social media details, you can add additional top and bottom lines to the receipts. To do this click on Settings and then select General. From there click on Set Custom Receipt Lines
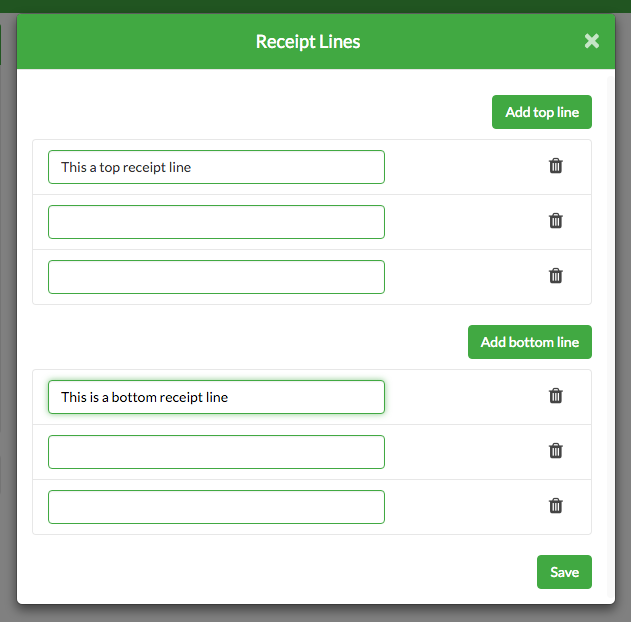
7. A screen will appear where you can input the information you would like to add to your receipts. Lines can be added to the top or bottom of the screen. Once you have added all the information, click Save.
Your company details will now be printed when you print your next receipt.
6. If you would like to add additional information on your receipts, such as a message for your customers or your social media details, you can add additional top and bottom lines to the receipts. To do this click on Settings and then select General. From there click on Set Custom Receipt Lines
7. A screen will appear where you can input the information you would like to add to your receipts. Lines can be added to the top or bottom of the screen. Once you have added all the information, click Save.
8. If you would like to delete any of the lines, just click on the "bin" icon next to the line and the text will be removed. Click Save to set the changes.
The saved Receipt Lines will now be printed on your receipts
The saved Receipt Lines will now be printed on your receipts
0 Comments