
1. Firstly, have you have signed up for your humble Till on our website ? If not, you can visit our website and sign up .
Once you have signed up you will then need to download the App.
2. Navigate to and click on the Play Store on your Android Device and search for the humble Till App in the search box on the top of the screen, once you have found it, simply click Install.
2. Navigate to and click on the Play Store on your Android Device and search for the humble Till App in the search box on the top of the screen, once you have found it, simply click Install.
3. Once you have downloaded the humble Till app, sign in to your humble Till using your login details you signed up with:
Connecting your Hardware
The below guide should help you getting your hardware setup and running a little easier.
The below guide should help you getting your hardware setup and running a little easier.
Printing:
The receipt printer/s that are compatible with the humble Till include the Epson TM-T20 Ethernet/ Epson TM-T88 Ethernet/ Epson TM-M30 Ethernet as well as the Epson TM-M30 Bluetooth/ Starmicronics SM-T300i Bluetooth and Starmicronics TSP650 Bluetooth
The receipt printer/s that are compatible with the humble Till include the Epson TM-T20 Ethernet/ Epson TM-T88 Ethernet/ Epson TM-M30 Ethernet as well as the Epson TM-M30 Bluetooth/ Starmicronics SM-T300i Bluetooth and Starmicronics TSP650 Bluetooth
The epson Ethernet Thermal Printers will need to have DHCP enabled on the Printer.
Purchased your printer directly from us? We’ve already enabled DHCP for you already.
1. Plug one end of your ethernet cable into one of the ethernet ports on your WiFi router.
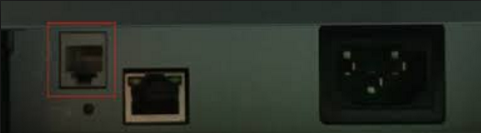
2. Plug the other end of the ethernet cable into the Epson TM-T20 Thermal Printer.
The Ethernet port on your Epson Printer is the middle port.
To learn how to enable DHCP on your Epson Printer, click here.
1. Plug one end of your ethernet cable into one of the ethernet ports on your WiFi router.
2. Plug the other end of the ethernet cable into the Epson TM-T20 Thermal Printer.
The Ethernet port on your Epson Printer is the middle port.
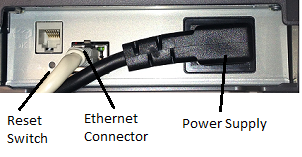
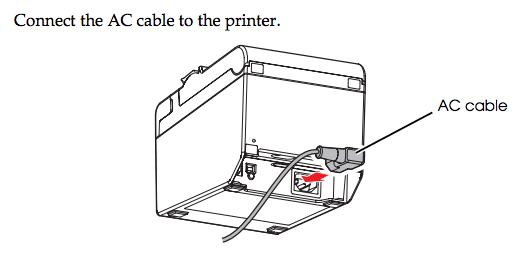
Plug the power cable into the printer and the stores plug point.
3. Turn the printer on. (green light will show on printer)
4. On your device make sure you are connected to the Wi-Fi network created by your wireless router.
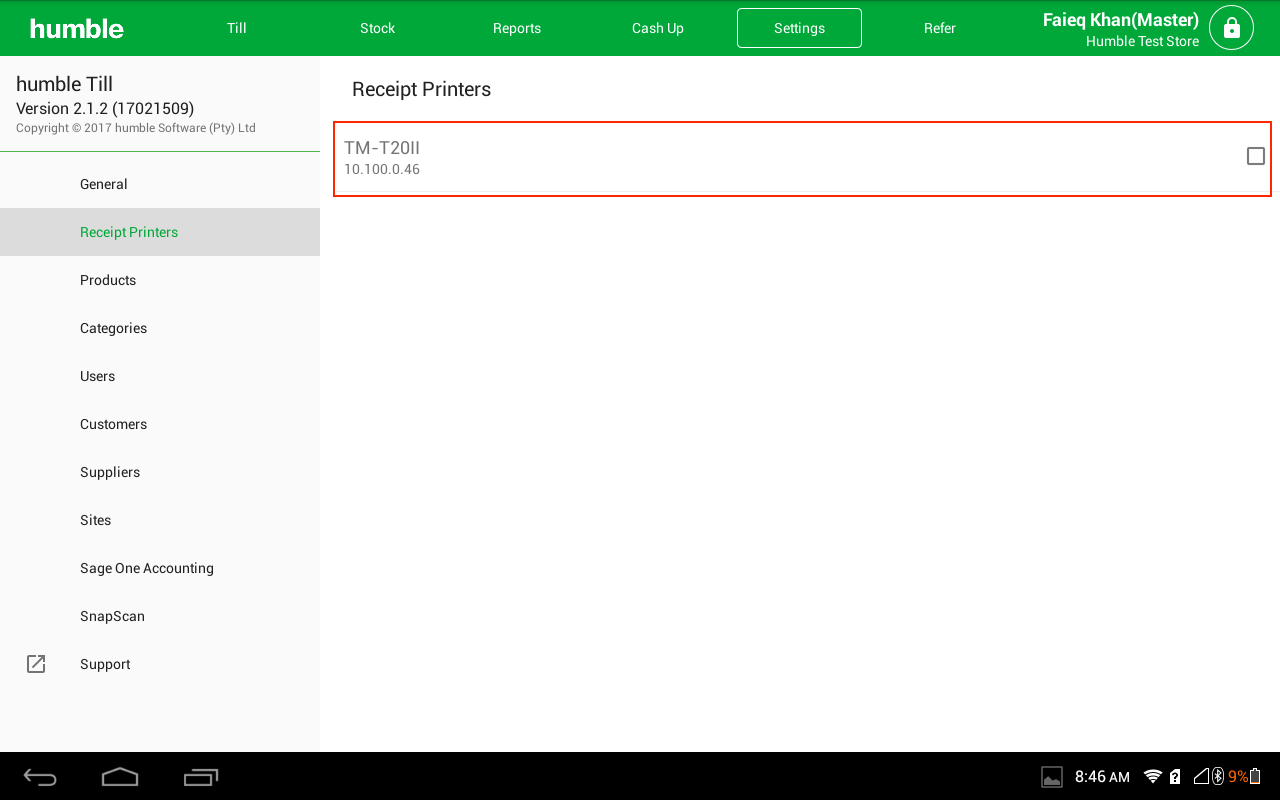
5. On the humble till app , select the Printer Setup tab.If the printer is connected correctly it will appear in the middle of screen screen . You can do a test print by clicking on the printer name to ensure the correct printer has been linked. This will automatically set the printer as your default printer.
6. Turn your printer power off.
7. Plug the cable into the cash drawer port (left port) on the receipt printer and into the cash drawer. Turn the printer on, the cash drawer is now ready to use.
0 Comments